Since then I have completely filled my life and house with paper crafting. I run a scrapbook blog (The Counterfeit Kit Challenge Blog) and have my own little studio filled with pretty supplies and even better storage for those supplies. I love to get messy, try new techniques and find ways to use up what I have.
With the Counterfeit Blog, a paying job, two kids, a family who wants to be with me every. minute. of. the. day....I am finding less and less time to document things. I take a lot of photos, but am slow at getting them in the albums. I needed a better way, but I needed something that would work for me and not keep me floating in guilt.
So I decided to try Becky Higgins Project Life concept.
I like the idea that it is faster, I can use what I have already and it can work right into the scrapbooking I already love to do. However, I am a thinking and a planner, so I had to really figure out how this was going to add to my creative process before I got started. Otherwise I was afraid I would become overwhelmed and would quit.
So, this is all of my research and decisions for how this will work for me. I hope you get some ideas from this and find a way to make it work for YOU.
For me, I need to get inspired BEFORE I start something and have plenty of it for when I get stuck. A huntin' I will go...
My Inspiration:
Project Life Inspiration: Over 100 Sites
Scrap Inspired
2 Peas Project Life Videos
A Little Bit of Me
Mercytiara's You tube channel
My Supplies:
Lots of ideas! I'm getting excited now! I have a room full of supplies and now need to figure out if I want to try and get a kit or just make my own. I'm a little worried that starting out making my own will bog me down and make it not so much fun for me right now. I was blessed to be offered a RAK of Project Life cards from a fellow scrapper that I "met" on a facebook group (Project Lifers)! Big thanks to Annie Mosely for the wonderful gift! She loaded me up! I was also gifted a Project Life Honey kit from a friend! WHOOHOO!

I also went through all of my scrapbook kits and cut apart the cute cards that are included in a lot of kits lately. They will be perfect and I didn't have to do anything!
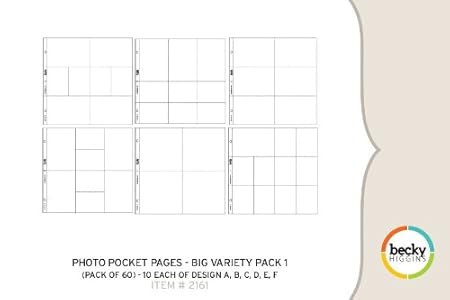
Next up is the page protectors and an album and, wouldn't you know it? Michaels had a sale that week! I picked up an album and a box of variety pack 1 of page protectors (love those 40% off coupons). I thought about just sticking with one page protector design, but who am I kidding? I get bored easily and knew I would want to mix it up.
My Organizing:
Now that I have that all settled, I really need to figure out a way to organize all of these cards. I know I will not use them if they are not organized in a way that makes sense to me.
So what to do? Now I have a sample of several collections. Do I just go ahead and mix them up and sort by color (I have done that with my paper in the past)? Or do I keep them by collection and just flip through them each time?
I know I want to use a variety of cards on my pages and don't feel the need to stick with just one collection, BUT I had a hard time breathing when I thought of mixing them (and yes, I don't like my food to touch either).
My solution: Keep each collection separate, but have them sorted by color in each collection. Happy Dance!
Here is how I did the Honey Collection:
1. The set came with 10 of each card (double sided) so I divided each "card set" into two piles, one with the front facing up and one with the backside facing up.
2. Then I put the piles into color groups based on the first color that jumped out at me on the card. I did have a pile for multi color cards that did not have a predominate color.

3. I left my 4x6 cards alone and made a pile of "word" cards, too.
Now that they were sorted, I needed somewhere to put them. My cabinets have great divided drawers in them, but when I put the cards in, they kept falling over and didn't look easy to manage.
Here are some ideas I found for how to store your cards.
Creative Organizing
Jen's Joint
A Pocket Full of Licorice
Scrapbook Obsession
I did a bit of browsing at some local stores and thought about what I needed based on how I would use it. I wanted it to be:
1. Portable
2. Easy to label each collection
3. Contained so the cards wouldn't become mixed up or fall out
4. Well divided. I do like to have sub categories!
This is what I found at Michaels and with a coupon, it wasn't horrible and I knew it would work for me:


Each box is labeled with the kit name and color scheme that is in the box. It will be easy for me to grab a "collection" and take it to a crop or in the other room to work. I LOVE it!
Before I FINALLY Get started on my first layout, let me share my Pinterest Board with you, so you can find some more inspiration as I pin away.
My Project Life Pinterest Board
**I pin a lot of free printables, so have fun printing out cards that you love with minimal work!
I'll be back soon with how my album is going to work for me and maybe we can take a look at making some of our own cards. And by the way, I totally know I am an OCD over planner. And I REVEL in it!


