Tuesday, March 29, 2011

New Challenge Blog


There’s a new challenge blog in town with articles, swaps, interviews, videos, challenges, great prizes and MORE! Check out Lily Pad Cards!

Monday, March 28, 2011

March Blog Hop!!

Happy Hopping! If you are new to the hop, please stop in at Counterfeit Kit Challenge to get started!

 This month's blog hop challenge was so fun...and hard...but fun!  We got to pick an older project that we had made and scraplift it.  Yep.  Scraplifting myself.  How weird is that?  I intentionally picked a REALLY old layout to lift.  I have grown/changed alot in my scrapbooking over the years and, although I am sentimental of my older work, I am not in love with any of them.  I already knew what photos I wanted to scrap, so that helped me narrow down the type of layout to scraplift.  An additional challenge I set for myself was to use some of the circus embellishments I added to my Mossy Knoll Kit.

Here is the layout I chose to scraplift:


This was Collin's first Christmas...and the last Christmas my Grandmother (my reason for moving back from Puerto Rico) was with us. 

And here is what I was "inspired" to create:


I started with the strips of background paper.  It was a nice way to get a mix of patterned paper on my layout without it overwhelming the photos.


I wanted to add some eyelets, but in a more structured way, so I made a little clown hat and used the eyelets for polka dots.


I was really excited about the journaling.  Sometimes I don't know what to say, but the story sort of flowed out this time..  I distressed the journaling spot with some distress ink and stamped some circular patterns around the edges just for fun.


The title on the original layout was pretty whimsical and fun.  For this layout I went with the flags idea from the kit to create a title banner.


Although the photos are fun, the patterns and vintage feel of the circus elements really help the layout not be too silly.  I have to say that I love it alot.

  Thanks for joining us on our hop!  Don't forget that you have a few more days to post on our March Link at our blog to be entered to win one of TWO prizes this month!  Keep creating!

Tuesday, March 22, 2011

Check this out! Momenta create your own stickers!

How cool is this:

Momenta Create Your Own Stickers


I know they are hard to see...LOL  But these stickers come blank and you get to decorate them however you want!  You can print on them with a photo...fill them in with colors or patterns....it even suggests your kid's art work!  So cool!


Love these!

Friday, March 18, 2011

Cupcake Happiness!

I LOVE ideas that help me use up my scraps.  I was browsing for some inspiration for birthday cards (my kids get invited to alot of parties) that I could whip up, but be cute at the same time.  Lookie, lookie:


These are PERFECT!  I used my Wildflower kit...I think the blue and grey cards could be boy/girl...the pink is for a party this weekend.  Love, love, love them!  I kept it very simple so I could mass produce, but you could really go all out with these!

Thursday, March 17, 2011

I am the Queen!

I recieved a wonderful box from my scrappy friend, Queen Pam!  She knows me oh, so well!

I almost didn't want to open it.  How pretty is this?  My favorite color and OWLS!


SHE MADE THIS BOX!  How cute is this?


She made the butterflies and mushrooms, too!!!  I am in awe!


Ah....owl stickers...and I thought I would have to carefully remove them from the box....


Putting a spinner on a card for me is like a dog seeing a.....squirrel!  Now I'll never get anything done!


Pam is awesome!  Seriously, she spoils me rotten and I totally don't deserve it.  I miss her!!

Monday, March 14, 2011

Great Mail Day!

Friday was a superb mail day for me!  Check out the loveliness!

I won a prize package from Momenta!  I was their 1,000th "like" on Facebook.  I have not used their products before, but they look fantastic!  Here is what they sent!


Next up is the Cricut Cart I ordered...can't wait to make some flowers!


And last, but not least, is some fun goodies from my friend, Jen...she cut them on her Imagine for me.


If anyone else wants to send me happy mail...I would love to get some!  LOL

Saturday, March 12, 2011

Wildflower Counterfeit

Last one!  Whoohoo!  I still can't believe that I have 5 kits sitting here ready for me to play with!  It feels like such a luxury!


Yes.  I did it again.  I pulled some paper from Basic Grey for this kit.  Let's move on now!  LOL


Embellishments:
Plantain Schoolbook for the alphabet
Die Cut made with the Storybook Cartridge
Buttons: Cut out on Cuttlebug...layered...stamped with patterns
Tulle flowers:  I MADE THEM!  I had to sew, but they are perfect!
Vintage Cards: Printed from online


Whew!  So which kit is YOUR favorite?  I'm having a hard time picking.  I'll let you know when I use them.

***More pictures/tutorials to make this kit on the Counterfeit Kit Challenge Blog!

Friday, March 11, 2011

Sunny Clearing Counterfeit

 I have a confession.  I feel like a bit of a cheat.  When I saw this kit...it immediately made me think of Basic Grey's Urban Prarie and Lemonade.  So I pulled paper from PRE-MATCHED STACKS!  Gasp!  LOL  It did make it easy.  The blue and green scalloped paper is from K&Co. Girl Scouts.


Embellishments: 
Yet another Cricut Cartridge for the Alphas: Lyrical Letters
Various Trims/ribbons
Made the butterflies
More of the snowflake chipboard in a different color pallete
Made the button clips
Various yellow flowers from my stash


I am SO glad these kits are not big!  I would never be done! 

***More pictures/tutorials for this kit are on the Counterfeit Kit Challenge Blog!

Thursday, March 10, 2011

Mossy Knoll Counterfeit

I'm not sure what is mossy...or knolly about this kit, do you?  The papers do not make sense to me, but maybe I am too theme oriented.

My papers are in my main picture at the Counterfeit Kit Blog.  I used all K&Co. papers.


I feel so clever for not worrying about not having alot of alpha stickers and just getting out my cricut carts to match the font.  LOL  Patting myself on the back now.

Embellishments:
Alphabet: Jubilee Cricut Cart
Number Flag Stickers: made them
Various Ribbons/trims
Metal Flowers:  MM flower brads
Various Buttons from my stash
Vintage cards: printed off the Internet

I'm intrigued by the circus them with this kit....I think it will be a neat new thing to try.

Still going okay?  You haven't given up yet, have you?

***More pictures/tutorials for this kit on the Counterfeit Kit Challenge Blog!

Wednesday, March 9, 2011

A Quiet Place

In our small group we have been talking about taking time each day to reflect, recharge and spend some quiet time with God.  One of the topics that has come up is WHERE we would truely enjoy doing this.  All of the wives/moms agreed that where we do our quiet time and where we would LIKE to do our quiet time are two different places.  LOL  We are tied down abit to kids schedules and nap time, so we can't always be in the place that recharges us the most.  If I had to choose a place to go and just be quiet every day, I would pick a wooded area.  I love the serenity of it, the beauty and the calm (if I don't bring my kids with me...LOL).  This inspired a layout for me and about who I am.  I just might have to frame this one.

I used my Into the Woods Kit and added some BG alpha stickers, orange/notbook paper flowers and bling.

Tuesday, March 8, 2011

Babbling Brook Counterfeit Kit

Now onto kit number 2!  Hmmm...first picture crooked!  LOL  I hate it when that happens, but it won't let me change it.  Anyway, here are my papers from that kit:

I used a book page paper (no company listed), K&Co. Girl Scout Paper, and made the alphabet paper, the circle paper and the round, scalloped paper.


The round, scalloped paper was pretty easy with my cricut and the Storybook Cart.  I just had to push cut.


I added some red faux stitching to mimic the red line on the original.  I toyed with the idea of glittering the scallops, but, honestly, didn't want to mess with it.  :)  See!  It is your kit!  Do what you want!


Embellishments:
Storybook cart to make the Alphabet, Tiny Type in brown, MS. Stamps, made ONE envelope (not sure if I would use more than one), I-Rock Bling, Flower ribbon, made the butterflies and the doilies are Christmas chipboard (some sort of snowflakes, I believe)


A nice mix of embellishments, I think!


How are your kits coming?

***More pictures/tutorials for this kit on the Counterfeit Kit Challenge Blog!

Monday, March 7, 2011

Mushroom Journaling Card

How cute was that mushroom card!  And go figure that I own several mushroom stamps.  LOL  No comments! 


I cut some tan paper slightly larger than my lined journaling stamp.  Then I measured my mushrooms and cut a paper the same size to use to mask off that area.


When I stamped with my journaling stamp, I put the smaller paper where I wanted the mushrooms so that area would be left blank.  I used a tiny bit of adhesive to keep it still while I stamped.


After that it was easy to stamp the mushrooms....


and color them in with some Copics.  Then I simply rounded the corners of the card.

I might have to make these more often.

***More pictures/tutorials on making this kit on the Counterfeit Kit Challenge Blog!

Sunday, March 6, 2011

Into the Woods Counterfeit Kit

At first I was thrilled about the idea of all of these mini kits.  Then the overwhelming feeling crept over me.  It was sort of like being in a store and not knowing what to look at first.


Since I want this to be FUN for you and not overwhelming, I am going to walk you through my kit making process (remember....we only  had 4 days to put ours together to show you!).

The key is to remember that you are making YOUR OWN kit.  You may copy as much or as little as you like about Into the Woods.  Don't feel like you have to copy every single thing from the kit.  If you won't use it then skip it.  I promise no one will tell.

Another important thing is to be as organized as you can.  Have a plan of attack!  My first step was to copy and past the list contents into a Word program to print out so I could have a paper list of each kit's supplies.  Then I thought about whether I wanted to pull ALL of the papers for each kit first or just focus on one kit at a time and complete the kit before moving on.  For me finishing each kit before moving on made more sense.


My paper:
Cardstock: 
Green, Cream, Yellow, Tan, Dark Brown
Patterned Paper came from the following:
The Paper Studio, K&Company, The Green Stack, Sassafrass Bungle Jungle, Cosmo Cricket the Boyfriend Stack


Embellishments:
Sunrise Thickers: Lyrical Letters Cricut Cartridge
Chipboard Shapes: Random Chipboard Stars
Label Stickers: Labels/shapes from Going Places, Graphically Speaking and Preserves Cartridges
Woodgrain Fabrips: Woodgrain pattern printed on Sticky Back Canvas (4x6 piece)
Mini Alphabet: Sassafrass Large Graph Letters
Remember Buttons: Random from my stash
Vintage Bumble Bee Stamp: CTMY Bugs set
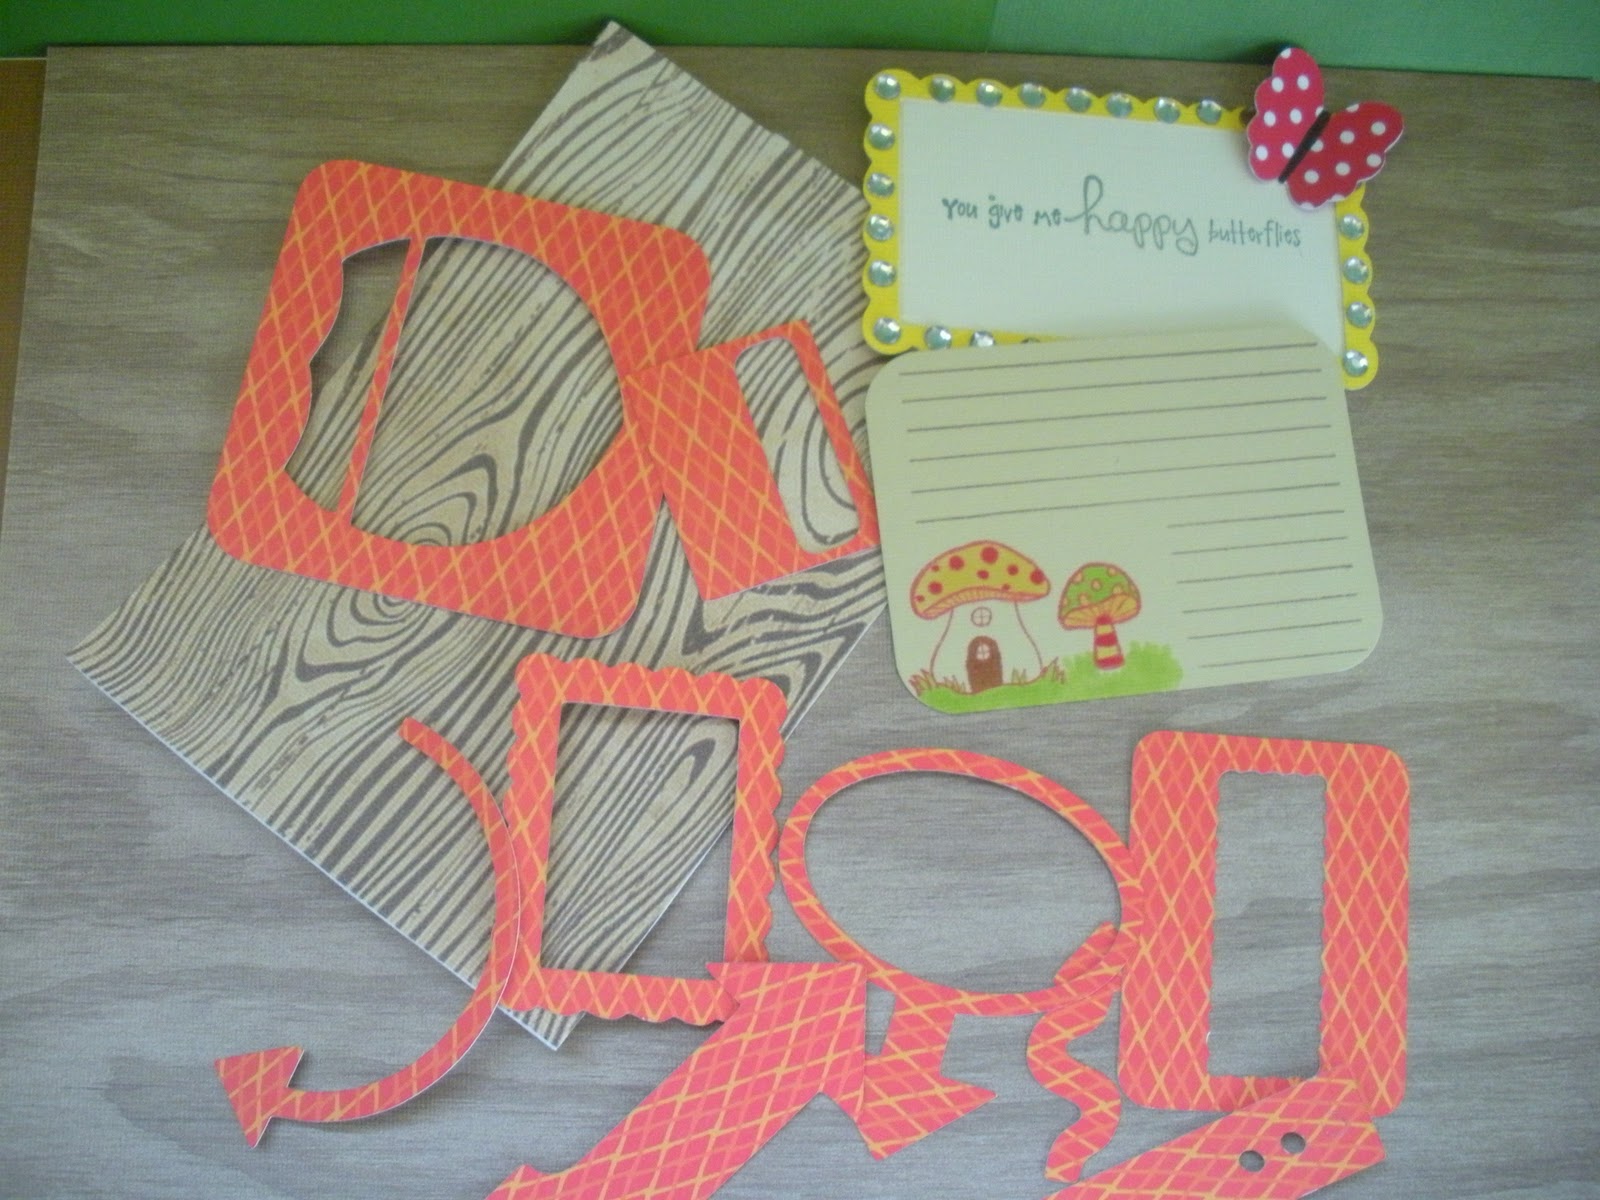
Veneer Journal Card: Made myself...check back tomorrow
Happy title: Made myself: Cricut Preserves Cartridge; Together We Bloom by Unity
Added: Tiny Type in Red


Aren't those orange shapes fun?  I had a ball making them!


Okay, I HAD to add a bunch of woodsey stamps.  I *cough* love owls, so I have alot of those stamps.

You can do this!  Just take it one step at a time!  You don't have to copy all of the kits like the three of use crazy ladies did.  Just pick what you like!  See you back here tomorrow for a pictorial of my mushroom notecard!

***More tutorials/pictures of how to make this kit on the Counterfeit Kit Challenge Blog!

Wednesday, March 2, 2011

Banner Love

Yep.  My crushes hit hard and fast.  I have been in love with banners since last year and have been making holiday and seasonal ones for our fireplace mantle and the kids birthdays.  However...my friends/family love them, too, and I frequently end up giving them away.  LOL  Here are a few I have made:


Now, I did not really make a Christmas banner because I did this Christmas Countdown Calendar instead:


I am in need of a Spring banner...my mantle is so empty since Valentines Day is over.  I have some ideas brewing in my head...but take at look at what I found...(Disclaimer...I did NOT make these, but I am crushing on them all the same.)


Don't you just love web browsing?  If you have any other thoughts on banners, please share with me.  I am in the idea collecting phase now before I start sketching it out.